Coolcoder360's Devlog/updates thread
-
New gruedorf time.
And another new project. Sort of.
Switching back to Godot for a bit, but I didn’t hit “New Project”! instead I opened an old project and now my new project is creating a Godot addon/plugin that automatically creates a controls menu which allows changing controls bindings.The idea is to basically create tools I can reuse in future to implement basic things like controls menu rebinding, maybe settings menus or other such things.
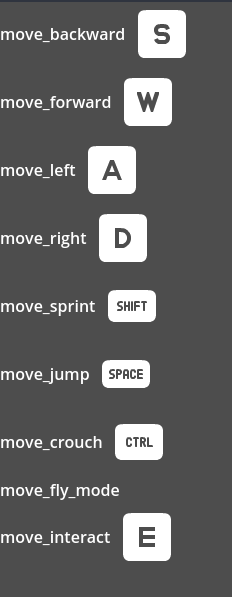
So far what I have is basically a script that creates a menu list of all the actions that are configured in the inputmap for the project, and then shows an icon next to it for any mapped buttons:

Using the Kenney input prompt icons of course, has support for mouse+keyboard, Xbox, PS4, PS5, Switch, Steamdeck, playdate. That’s enough platforms for me for now I think.
So far I’m only dealing with keyboard inputs, I’ll need to play around with supporting mouse input and then controller input bindings.
Then I hope to make it so I can select and then choose a new input option, making it play nice with controllers and mouse+keyboard of course.
I’m also ignoring all the built-in actions right now that start withui_because there are a ton of those and they kind of clutter up the list. I’m thinking for right now that people usually don’t want to re-map the buttons that are used to navigate the menus or do text input, so I shouldn’t bother to let those be an option for now.I’m also working on compiling Godot from source, once you have the dependencies its actually really easy to do, so that’s been good.
I found this Godot Build Options Generator which basically generates acustom.pyfile you can use to make your Godot builds be smaller and have unnecessary modules compiled out of them, for games that might not need all modules (like, if your game is entirely 2d, why bother with 3d file format import/export support, or even 3d support in general?)May look into trying to make some Godot Modules myself or other plugins as needed, right now leaning towards plugins that can just be included as part of a project to help get basic building blocks like menus working faster, maybe other features like my own character controllers or similar things like that.
I do use other character controllers or other plugins from the assetlib from time to time but for some things like character controllers I like to make it myself so I know all the ins and outs of it and how to make it do what I want/need.
Then maybe I’ll get something put together for an actual game that uses all these plugins, since doing the plugins should make getting a game together faster if it’s just a matter of including all the different plugins to make the boring parts work.
-
Some more progress on my plugin, moving some stuff out to a singleton to provide a better API where a game script can call into and then retrieve the right icon for an action.
Also adding a little “tutorial” prompt sort of thing:

Displays at the bottom right and disappears (not fade, just pop-in and pop-out directly with no transition right now) after a few seconds.
Might change that up to tween up from bottom of the screen or something like that.
But seems useful to be able to provide a way to just callcontrols.popPrompt("move_forward")and then the little pop up will just go, built-in, with the only thing needed to do is mapmove_forwardto a default key/control and then give a translation file for translatingmove_forward. Which I might change to say “Move Forward” rather than just “Forward”. Given this silly example which doesn’t seem to have correct/proper english.Other than that I think things are going well with this, not doing full joystick detection yet to remap things, but I think it should be able to detect whether a joystick/controller is being used vs if a keyboard/mouse is used.
Then the trick is to add controller support to the methodsgetIcon(event)andgetBestIcon(action)since thegetIcon(event)takes an InputEvent to give an icon for (useful for the full remapping menu to have an icon for each event) and then thegetBestIcon(action)would use the controller vs keyboard detection to show the right icon for that action based on which input they’re using, hopefully specific to their controller (which right now I’m not trying to detect too much, I have only 8bitdo controllers so I can’t really test this out too much).Once this is all together then I guess it’s a matter of making an game’s menu where the controls remapping menu would go, then adding ability to save out the mapping and ability to load in and reset the mapping, and also a way to restore to defaults. Almost there!
-
Been a long time for updates, I’ve gone onto several other games projects since my last few posts, and while those are fun I’m actually here to talk about something slightly more boring but possibly useful enough to share the code/pdf!
For work I end up taking a lot of notes in notebooks, but one of my peeves about that is I often end up with so many notes that I burn through notebooks fast.
Fast enough that I’ve decided I’m going to just print and bind my own damn notebooks (Some of the ones my wife got me on some sale deal lately are smaller than normal, so I burn through one notebook in about 2-3 weeks, they came as a pack of like 10 or so little notebooks, but it’s kind of bothersome to have to swap notebooks that often because it means I might have to reference something across multiple little notebooks.Part of having a notebook of course is having lined paper to print onto the copy paper in order to have some lines to write on, if I don’t do that my writing will warp all over the page.
You can find resources for printing lined paper all over the place, but the slight issue I have is that usually they’re meant for printing onto a solid 8.5x11 inch sheet of paper, which isn’t conducive to binding together into a notebook.
What I want is to basically print something sideways onto an 8.5x11 sheet, so that I can just fold it in half, stack a bunch together, and staple them together into a notebook segment like you might see in one of those fancy schmancy traveler’s notebooks.So to do this, I decided I may as well use LaTeX, it’s a tool I’ve used on and off over the past 10 or so years to make various pdfs of stuff.
I found this resource for how to make lined paper using LaTeX and tikz: https://michaelgoerz.net/notes//printable-paper-with-latex-and-tikz/It’s a good resource, and it got me 99% of the way there!
What I did was I took his college ruled letter size page: pdf download, tex source
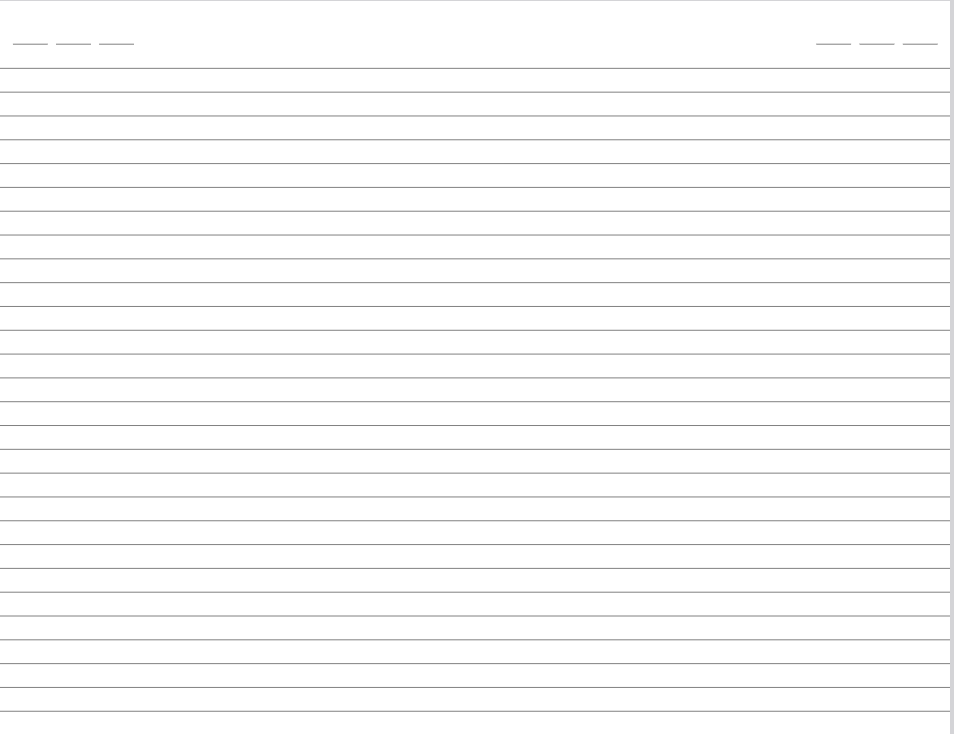
And then copied out the college ruling, and then turned it sideways to landscape, added little date lines at the top left and right sides of the sheet of paper, and then duplicated all that to be on a second page too (because when printing multiple copies, a printer does not want to duplex print the same document onto each side of the page, for whatever reason when test printing it decided to just spawn a new page entirely for each copy of a 1-page document. Yeah I guess that makes sense when you normally print multiple copies of a document, but that means we need to have two identical pages in our pdf in order to print it properly)So here’s the code:
\documentclass[letterpaper, 10pt,landscape]{article} %for letter size paper
%215.mm x 279.4mm
\usepackage{tikz}

\begin{document}
\pagestyle{empty}

%page 1
\begin{tikzpicture}[remember picture, overlay]

\tikzset{normal lines/.style={gray, very thin}}

%draw date lines

\node at (current page.south west){
    \begin{tikzpicture}[remember picture, overlay]

        %left side date
     \draw[style=normal lines] (0.15in,8.0in)--(0.55in,8.0in);
     \draw[style=normal lines] (0.65in,8.0in)--(1.05in,8.0in);
     \draw[style=normal lines] (1.15in,8.0in)--(1.55in,8.0in);

     %right side date
     \draw[style=normal lines] (9.45in,8.0in)--(9.85in,8.0in);
     \draw[style=normal lines] (9.95in,8.0in)--(10.35in,8.0in);
     \draw[style=normal lines] (10.45in,8.0in)--(10.85in,8.0in);
        \foreach \y in {0.71,1.41,...,19.81}
        \draw[style=normal lines](0,\y)--(11in, \y);
    %\draw[style=normal lines] (1.25in,0)--(1.25in,11in);
    \end{tikzpicture}
};
\end{tikzpicture}

\pagebreak

%page 2
\begin{tikzpicture}[remember picture, overlay]

\tikzset{normal lines/.style={gray, very thin}}

%draw date lines

\node at (current page.south west){
    \begin{tikzpicture}[remember picture, overlay]

        %left side date
     \draw[style=normal lines] (0.15in,8.0in)--(0.55in,8.0in);
     \draw[style=normal lines] (0.65in,8.0in)--(1.05in,8.0in);
     \draw[style=normal lines] (1.15in,8.0in)--(1.55in,8.0in);

     %right side date
     \draw[style=normal lines] (9.45in,8.0in)--(9.85in,8.0in);
     \draw[style=normal lines] (9.95in,8.0in)--(10.35in,8.0in);
     \draw[style=normal lines] (10.45in,8.0in)--(10.85in,8.0in);
        \foreach \y in {0.71,1.41,...,19.81}
        \draw[style=normal lines](0,\y)--(11in, \y);
    %\draw[style=normal lines] (1.25in,0)--(1.25in,11in);
    \end{tikzpicture}
};
\end{tikzpicture}

\end{document}
Run that bit through pdflatex and you get two pages that look like this (can’t upload the pdf because of reasons…)

Print them duplex, flipping on the short side (since this is landscape) and then presto, you got a double sided sheet with lines that you can print a bunch of and then fold and staple to make your own notebooks.
I haven’t run all the numbers here on cost savings but I think it’s safe to say that when you get 1500 sheets of copy paper off amazon for $23 it’s going to be cheaper to make 1500x4 pages of notebook paper (remember we’re talking the 8.5x6.5 sheet from folding the 8.5x11 in half, roughly equivalent perhaps to an A5?) than it is to buy that many pre-made refills of a notebook.
In fact some of the inserts I’ve finding for traveler’s are even narrower than these, running 8.25x4.25, so this may even be bigger sheets of paper!